@Sebastien I agree that it is hard to evaluate the possibility of using the Robotiq Wrist Camera with certain parts without trying them first. Here are a few parts that I have successfully taught to the vision system.
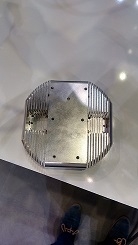
This part was about 5 wide. The part was made of aluminum and was quite shiny. I taught this part to the vision system on a UR3. The snapshot position was close to the UR3's maximum height.
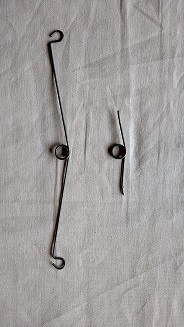
I taught the modified part on the right. This part was too long and too thin to teach, so I cut the part make it easier to teach to the vision system. The camera was mounted on a UR5 for this part.
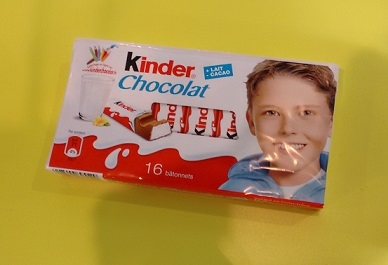
This chocolate bar package was about 5''x3''. I taught this using the camera on a UR5.
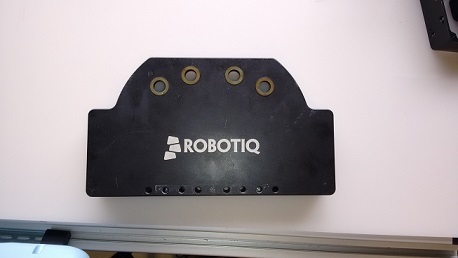
This part is about 12" long, 7" wide and 2" tall. I taught this using the camera on a UR5. I had to find a snapshot position that was high enough to respect the ratio between the background and the part, but far enough from the robot's reach limit. It was important to stay away from the robot's reach limit since I didn't want to run into an unobtainable position during the camera's calibration. And I used 4 pieces of yellow paper to create a large background for the teaching process.

The Dof Community was shut down in June 2023. This is a read-only archive.
If you have questions about Robotiq products please reach our support team.
If you have questions about Robotiq products please reach our support team.
 Tyler_Berryman
Hi Pros,
When visiting potential clients we are often faced with vision applications for locating different parts. I find it always tricky to see right off the bat if a specific part can be found using the Robotiq camera. Concerns about the part being able to be found by the vision software are often related to:
- Parts size (not large enough, too thick, etc)
- Parts has printed features on it so not sure how reliable the match algorithm will work.
- Metal parts that are shinny and sometimes the shine varies from one part to another (Some are more oxidized than others)
- Complexity of the shape of the part.
Can anyone share pictures of the parts that worked well with the Robotiq camera, along with the type of backgrounds they had!