Home› Robotiq Products
Discussion
Back to discussions page
Etienne_Samson
Beta Tester Beetle, Wrist Camera URCap 1.3.0, Vacuum Beta tester Posts: 419 Handy
Pick & Place with Insertion in Jig |
346 views
|
Answered | |
/ Most recent by Tyler_Berryman |
7 comments |

Challenge with increased difficulty: Pick & Place with insertion in jig
Provided material :
Hint: Use the sensor signal to guide the jig insertion.
Good luck!
Provided material :
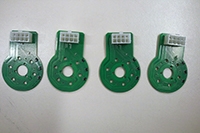
- Multiple PCBs
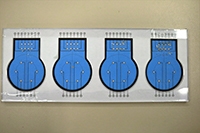
- PCB test jig
Hint: Use the sensor signal to guide the jig insertion.
Good luck!
Etienne Samson
Technical Support Director
+1 418-380-2788 ext. 207
[email protected]
[email protected]
After a million iterations, Task 2 complete!
Code
Ryan Weaver | Automation Engineer | Axis New England
[email protected]
https://www.youtube.com/user/AxisNewEngland
https://twitter.com/axis_newengland
Challenge 2 complete:
Code
Code
Team4 @Juanjo @Enric @Adam529dp
Vicosystems S.L.L.
Industrial Collaborative Systems
[email protected]
Code
Code
Robotiq Integration Coach
[email protected]
1-418-380-2788, option 3
For this challenge, we used the vision system to identify the PCB. Then, we used the object detection feature to verify that our pick was successful. Upon a successful pick, we move the PCB towards the insertion jig with a slight angle. This angle will give clearance to the pins underneath the PCB. The next step in the program is to slowly move the PCB towards the end of the insertion jig. While the robot is moving the PCB, we are constantly monitoring the force to see when the PCB has encountered the edge of the insertion jig. Once the force has reached the threshold that we set previously, the robot will lay the PCB flat against the insertion jig. This will avoid any possible "Sticky Finger" Problems when releasing the part. We have also used popups to show when you could use an I/O to empty your tray or to activate a feeder.
Enjoy!
Robotiq Integration Coach
[email protected]
1-418-380-2788, option 3
Robotiq Integration Coach
[email protected]
1-418-380-2788, option 3