Home Troubleshooting

Discussion

Left ArrowBack to discussions page
grpietrogrpietro Unconfirmed Posts: 4
edited January 2021 in Troubleshooting
Hello everyone, 
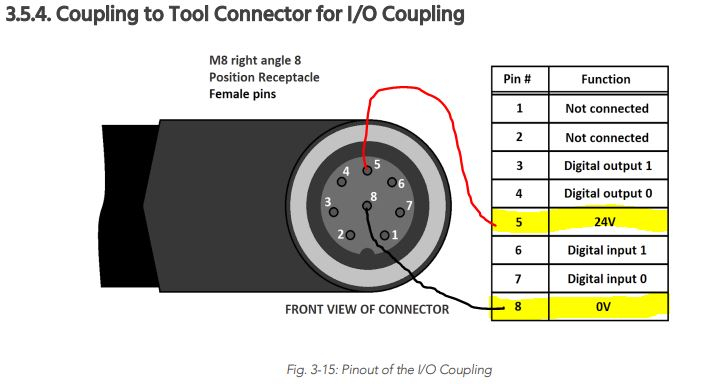
I am new to Robotiq grippers, and I am currently trying to test a 2F-140 gripper without ribot arm while waiting for it to be available. My question is if it would be possible to control the gripper through user interface connecting to the I/O Wrist Coupling via USB to the computer using the pinout configuration shown in Figure 3-15 here.
The idea would be to use the M8 connector on the I/O Coupling to power the gripper and to connect through USB to the pc using a MOXA rs483 to usb converter.
Thanks in advance for the support.

Best Answer

  • bcastetsbcastets Vacuum Beta tester Posts: 674 Expert
    Answer ✓
    The RS485 USB converter cannot be use use with IO coupling.
    The only think you have to do is to connect the micro USB cable to your PC and supply connector with 24V power.

Comments

  • bcastetsbcastets Vacuum Beta tester Posts: 674 Expert
    It is possible to do that.
    You can power the IO coupling via the M8 connector and then control the IO coupling via USB using Robotiq client interface.
    Make sure you have the correct wiring before applying power.
  • grpietrogrpietro Unconfirmed Posts: 4
    I have done that but still cannot connect. The scanned port name remains solid red on the user interface, and when trying to auto connect, a Connection Error is raised: "Auto connection failed. Possible causes include a wrong COM port (or IP address) or the Gripper being unpowered".
    I have double checked all the wirings, set up the port as suggested in the default parameters, and the gripper is correctly powered (status LED solid blue).
  • bcastetsbcastets Vacuum Beta tester Posts: 674 Expert
    If the LED is solid blue it means that the gripper is powered and communicate with the coupling. It looks like you are ok on the power side.
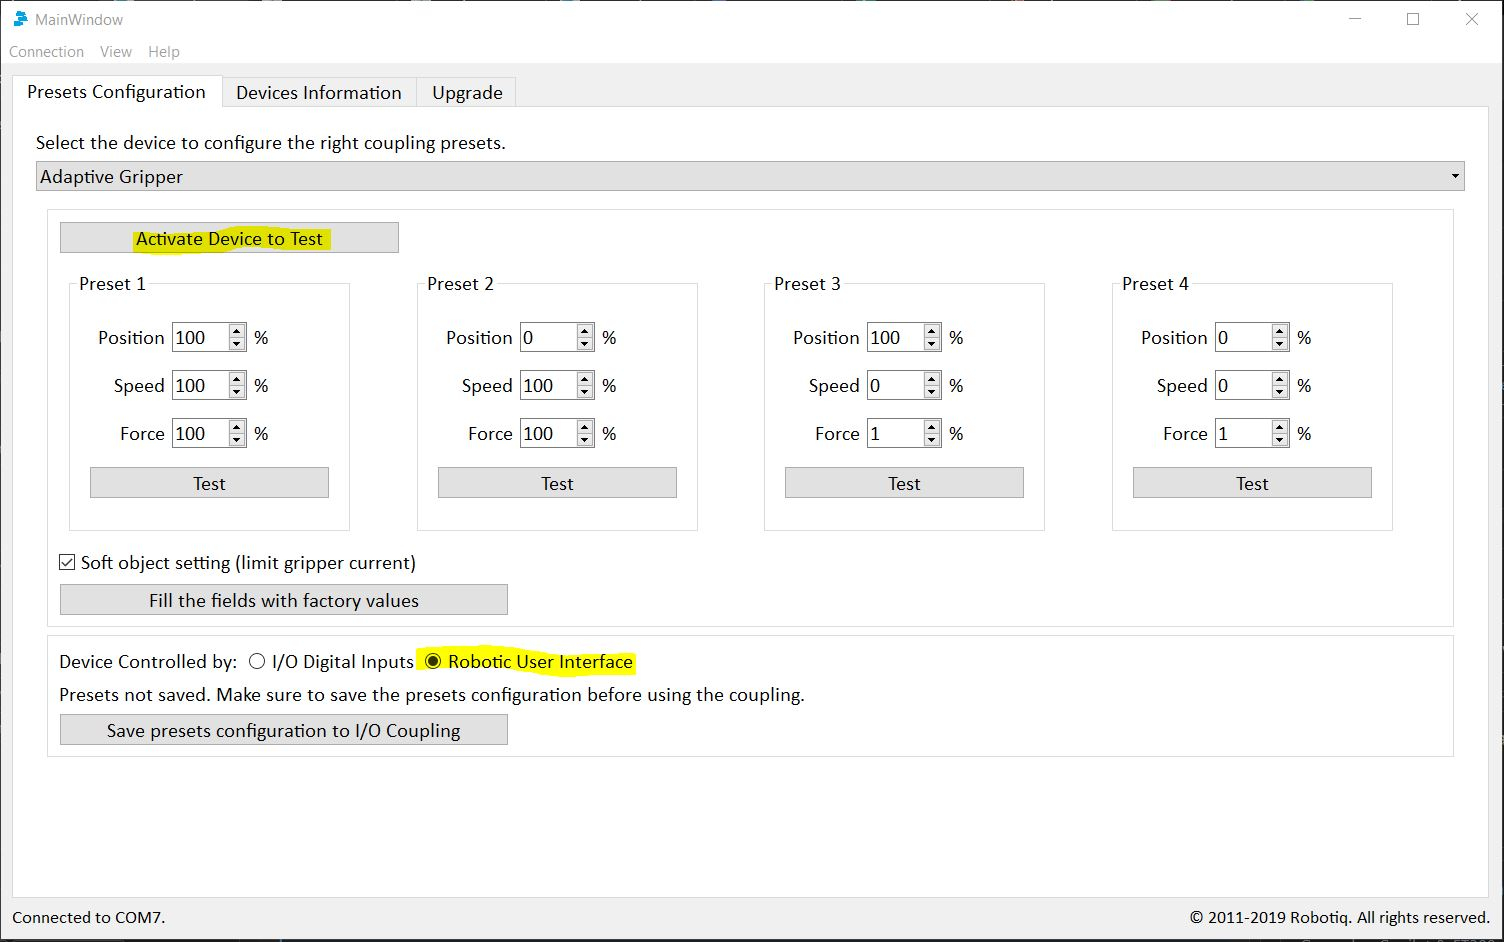
    You also have to connect the micro USB cable to your PC. Make sure your cable is a USB cable with communication capability. Some time those cable only have power wires to charge electronics devices.

    1. Check device controlled by "Robotiq User Interface"
    2. Click on " Activate device to test" 
    3. click on the test boutons to execute an action

    Here below are the details of the setup.


  • grpietrogrpietro Unconfirmed Posts: 4
    Actually, I was able to access the preset configurations connecting to the coupling through micro-USB. What I am currently failing to do is to connect through an RS-485 to USB converter, as shown in point 2. of section 3.2 of the instruction manual (my setup being, at the moment, precisely what depicted in figure 3.2.2).
    Sorry if I didn't explain myself clearly before, and thanks for your help. 
Sign In or Register to comment.
Left ArrowBack to discussions page